
Choose a Kit tag for a class
Associate an enrolled student class with a tag in your connected Kit account.
Connect Kit on Connections, then open a class and choose Email Marketing.
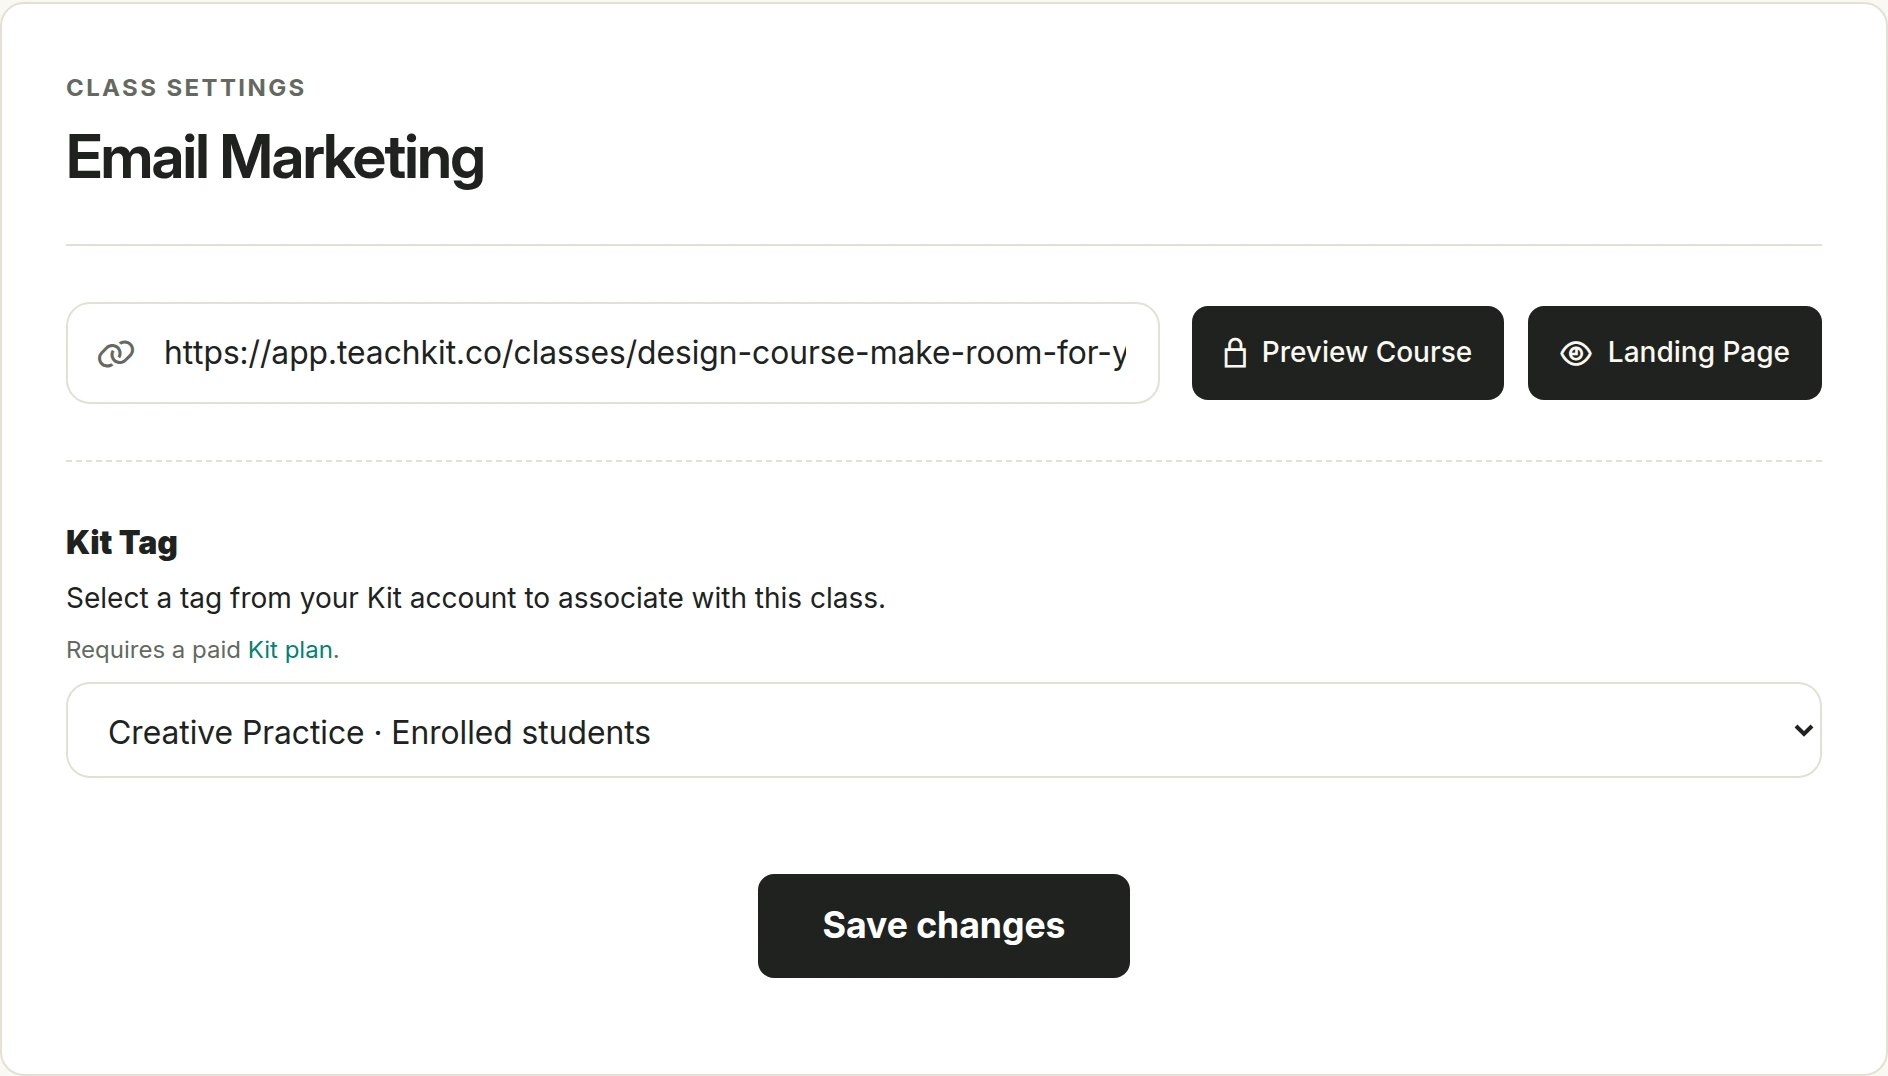
Select the tag
- Create the tag you want to use in your Kit account if it does not already exist.
- In the class editor, open Email Marketing.
- Select the tag in Kit Tag.
- Choose Save changes.
- Reopen the page to confirm the selection.
The page notes that this integration requires a paid Kit plan. Each class selects its own tag, so choose names that help you distinguish your classes in Kit.
Configure your emails in Kit
This page associates the class with a tag. It does not contain an email composer or a sequence builder. Create any welcome messages, follow-ups, or automation rules in Kit and check how they use the selected tag.
If the tag list is empty, confirm that the correct Kit account is connected and that the tag exists in that account. Refresh the page after creating a tag. If you see Connect Kit on the Connections page to select a tag, complete the connection first.
Do not assume changing this setting retroactively updates all previous students. Check the records in Kit and use an appropriate import or workflow there if you need to handle existing students.
See the Kit connection guide for connection and enrollment details.